October 2019 Update: Just install WordPress using your web host’s one-click installer and then use the All-in-One WP Migration Plugin for installing the PLR blog. Read the quick guide here.
There’s no need to follow the below guide anymore.
Use this guide if you’re using webhost with vDeck as the control panel. Popular webhosts with vDeck control panels are Domain.com, iPage, and Fatcow.
Click here to see how a vDeck Control Panel looks like.
IMPORTANT: DO NOT install WordPress on the destination server. The importbuddy script will install all files, including WordPress. Delete any pre-installed WordPress to avoid installation conflicts.
Also when you’re installing on an Addon Domain (additional domain/s aside from your primary domain), make sure that you already set a separate directory. Please read this tutorial on how to set a directory for your Addon domain.
Part 1. Create A MySQL Database
1 Log in to your vDeck Control Panel.
2 On the vDeck dashboard find the “MySQL Database” icon.

3 Click the “MySQL Database” icon and you will be redirected to the database management page.

4 Click the “Add Database” icon.

5 On the pop-up form, enter your desired Database Name, Username, and Password .
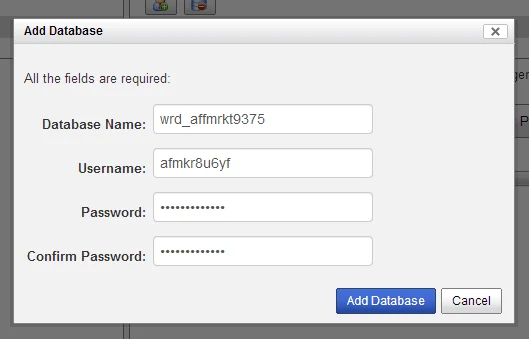
IMPORTANT: Use lowercase letters only for database name and username. Otherwise, no database will be created and you’ll only see annoying screen messages such as this:
“Your database names must consist of lowercase letters, numbers and underscores with at leas one non-numeric character.”
6 Don’t forget to save your database details for later use.
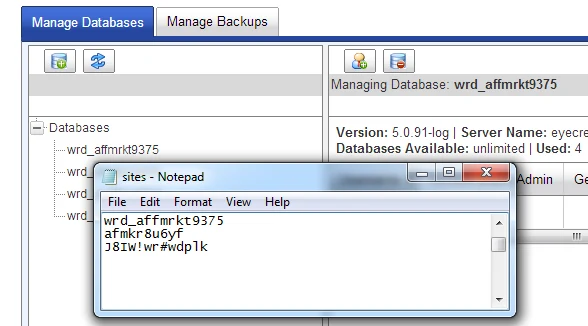
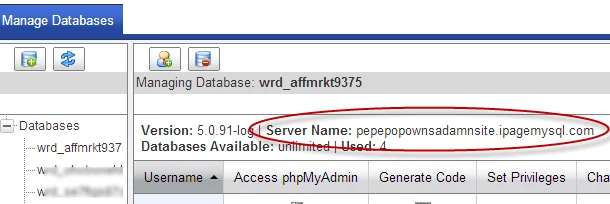
7 Also, don’t forget to take note of your database’s Server Name. You can find this info on the right side of your database management page.
That’s it.
Part 2. Upload the Installation Files
1 On your computer, unzip the blog package you downloaded when you purchased it from PreMadeNiches.com. You can use WinZip or WinRAR. Free WinZip version is usually pre-installed in most Windows-based computers.
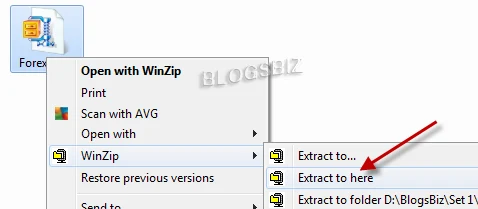
2 After unzipping, open the folder “Files To Upload“. This is where the actual “installation files” are placed.

3 That folder should contain the “backup file” (usually in a “backup-blogname-some78ue” filename format) and the “importbuddy script“. DO NOT unzip the backup file.

4 Upload both the “backup file” and the “importbuddy script“.
For this type of webhost interface, I prefer using an FTP software instead of uploading using the built-in vDeck uploader. My preferred FTP software is FileZilla because it’s so easy to use. You can donwload it here. It’s FREE!
5 Launch your FTP software. For this tutorial, let’s assume you’re using FileZilla.
6 Click “File” and then click “Site Manager“.

7 Click New Site and give it a name. This will differentiate it from other FTP accounts that you may already have or maybe add in the future.

8 On the “General” tab, simply fill up the Host, Port, and then User and Password. You can set the Logon type to “Normal” but if you’re concerned about password security then set it to “Ask for password“.
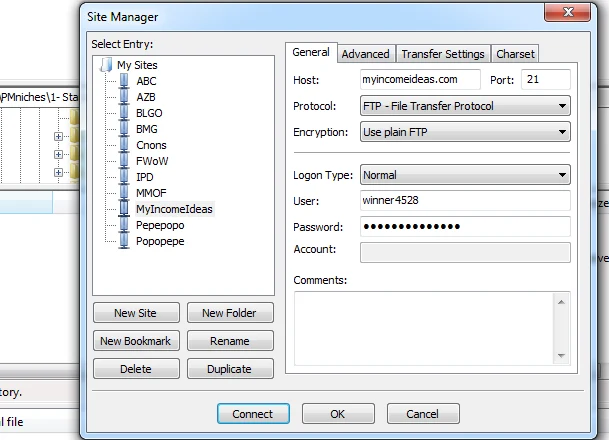
9 Click Connect button.
10 Now on your PC, find the folder where you downloaded the blog package. Upload contents of the “Files to Upload” folder into the root directory of your domain. Just highlight the file you want to upload then drag and drop it in the right panel.
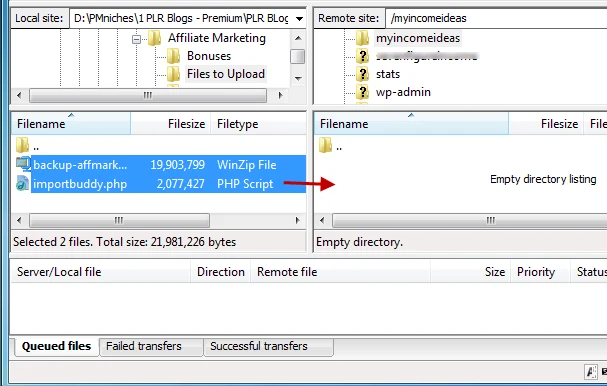
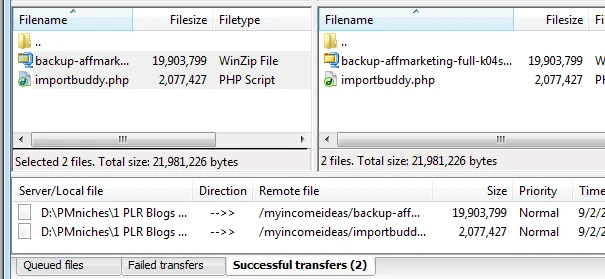
11 That’s it. Just wait for the upload to be completed then proceed to the next step.
Step 3. Run Installation Script
1 On your browser, type http://www.yourdomain.com/importbuddy.php then hit the “Enter” key on your computer keyboard.
So since we’re going to install Forex Blog to our newly bought domain forexfans.org, we will type: http://forexfans.org/importbuddy.php

NOTE: Just in case you see error message such as:
“Error #224834. This directory is not write enabled. Please verify write permissions to continue.“
It’s a very common problem for webhosts like this. Contacting the webhost support may slow down your workflow.
So, the quickest solution is to simply create a directory for the domain where you intend to install even if it is your Primary Domain. Point the domain to the newly created directory then move/copy the installation files. Follow guide on how to set directory here.
2 Enter ImportBuddy password.
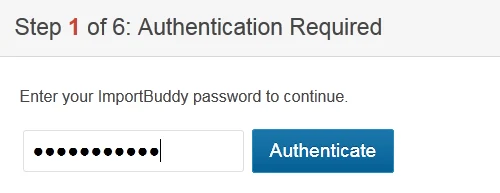
NOTE: The ImportBuddy password is included with the download file. Open the “Login Details” using Notepad and you should see that password in the first 5 lines.
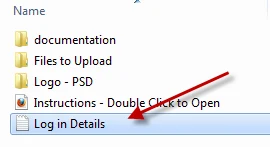
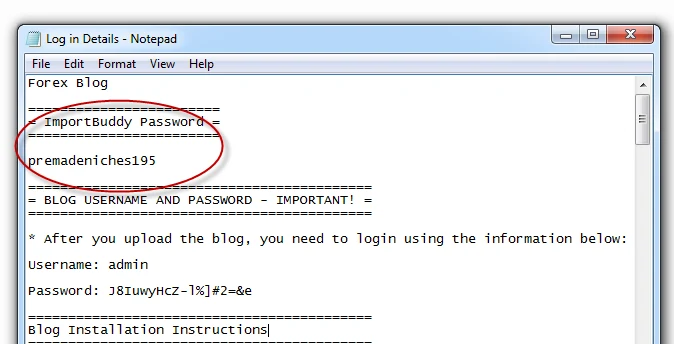
Also, your default login username and password for the blog is found in there.
3Click “Authenticate” button to continue.

4 Click Next Step to proceed. Nothing to configure here.
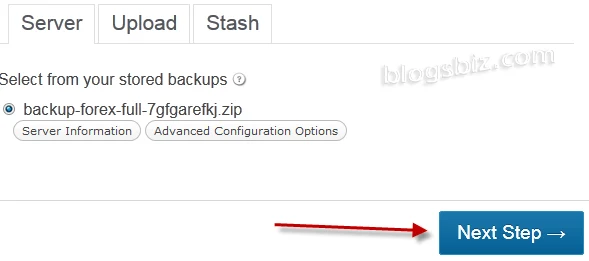
5 Again on the next page “Step 2 of 6: Unzipping Backup File“, click Next Step button as long as the wizard says, “Files successfully extracted.“

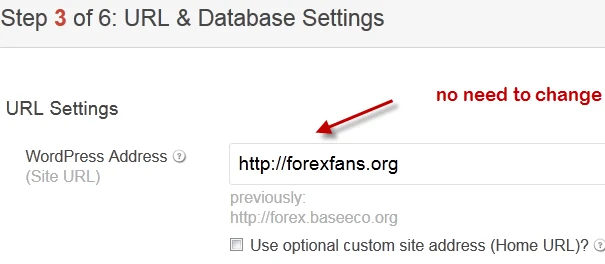
6 Now, on “Step 3 of 6: URL & Database Settings” you may want to use custom url for your site. However, this is not recommended if you don’t know exactly what you are doing. So no need to change this one.
7 Change Database Settings. This is a crucial step. You’ll really get pissed off and frustrated here if you do it wrong. 🙂
Now, open the notepad where you saved the database info when you created it in Step 1. Simply copy and replace old database info with the new ones.
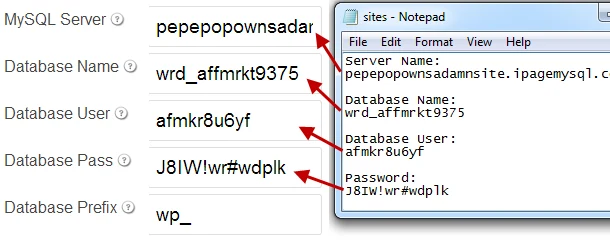
IMPORTANT: You must enter a “Server Name” into the “MySQL Server” box (change the “localhost“). The server name is assigned to you by your webhost when you first sign up.
You can find this info on the right side of your database management page. Remember that page where you created a new database?

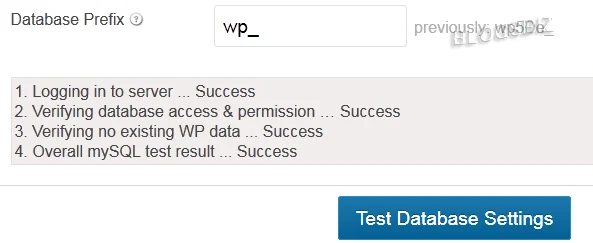
8 When you’re done changing the database settings, click the “Test Database Settings” button to check if the installation script can connect to the database with those details. If all indication says “Success”, then simply click on the Next Step button to continue.
9 On “Step 4 of 6: Database Import” you should see the message “Initial database import complete!“. Click “Next Step” button to proceed.
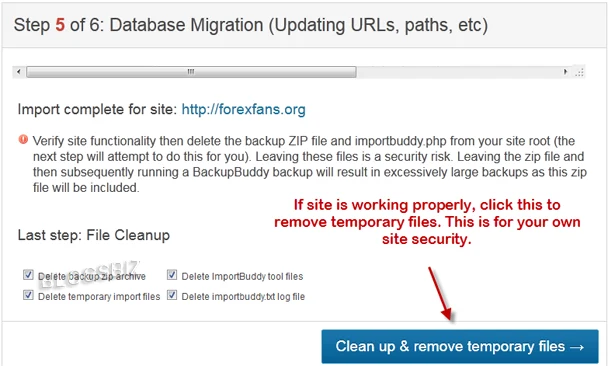
10 On “Step 5 of 6: Database Migration (Updating URLs, paths, etc)“, check if your new site is working. Simply click the url after “Import complete for site:” in this case, http://forexfans.org.
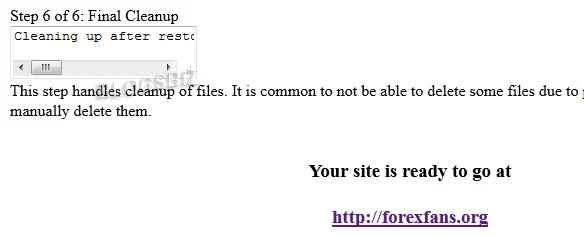
11 Site is complete! Congratulations, you have a new website.
The installation process is simple and straightforward. After 2 or 3 more successful blog package installations you should already be comfortable and may not need to follow this guide anymore. You can be on your way to set up more niche blogs that can make you good steady passive income in the days to come.
You can now log in to Your New WordPress Site to Replace Affiliate Links.
IMPORTANT: After installing your ready-made blogs make sure to update WordPress and all themes and plugins.
Here’s a tutorial on how to do that: Update WordPress and WordPress Plugins

